On your Booking Pad site, click on 'Add Event'

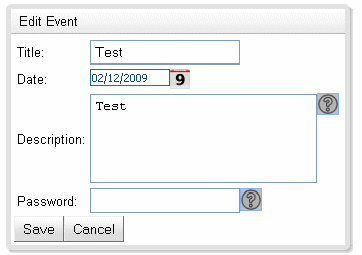
Fill in a name, date and description and then click on 'Save'

The event list will reload, when it does click on the 'Open' button

You will see a Blank page with some Buttons on it. Click on the 'Design View' Button

This is where you create your Booking Event. You can add Images, Booking Slots and Text to your sheet. Start by Clicking on 'Add Slot'

A Booking Slot will appear, this is where your customers will eventually book, Practice Dragging the slot around and resizing it.
When you are finished with this. Click the little checkbox item in the top lefthand side of the slot. When this checked click on the 'Copy Selected' button. Another slot will appear. You can copy many slots. This is useful for copying rows of slots.

If you have two objects selected, dragging one will drag the other around as well. This is useful for when you want to keep objects aligned.
Next we are going to add some text to the event. Click on 'Add Text'

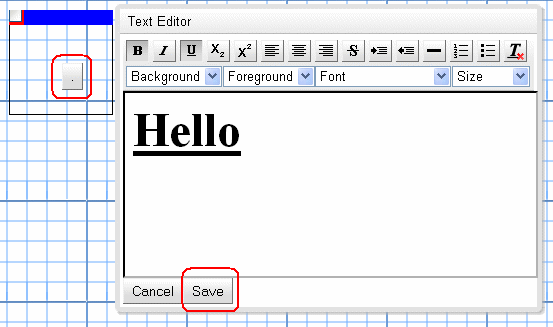
A box will appear on the sheet. Click on the button in the middle. Type the word “Hello” and then click 'Save'

You will now be able to drag and resize the text box just like the booking slots.
Now we are going to add an image. Click on the “Upload Image” button. Select an image (gif,jpg or png) from your local hard disk and click on “Confirm”. You can move the image around like the other items you created.

This tutorial has shown the basics of creating your own Booking Pad event. For further information, have a look at the other tutorials.