When you create Booking Pad events it can be hard and time consuming to position the booking slots exactly where you want them to go. In this tutorial we are going to demonstrate an easy way to get the slots exactly where you want them every time.
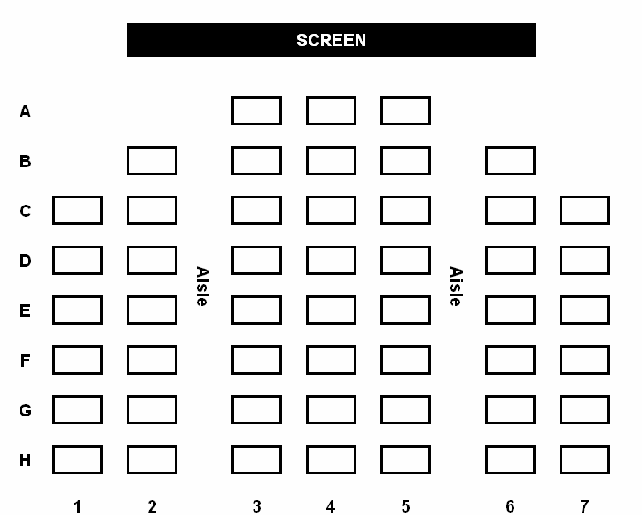
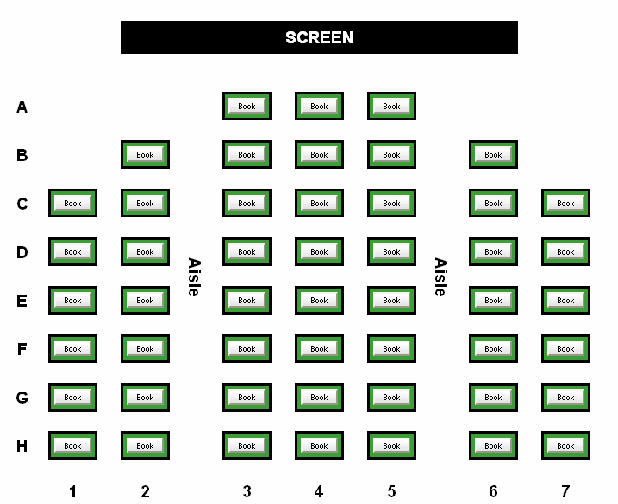
First open up your favorite image editing software and draw the back drop for your booking sheet as you normally would. Here is one I have drawn:
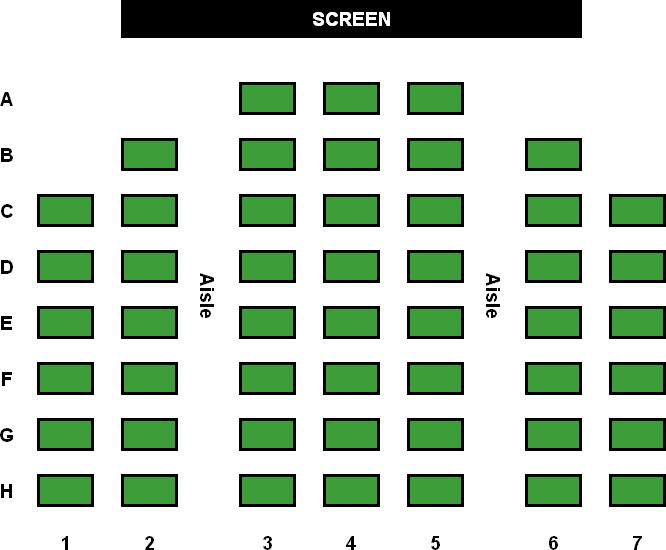
Now we are going to add the places for the booking slots, directly to the image! The trick is to fill the seats with the exact green that Booking Pad uses to display vacant booking slots as. The color is #3d9d39 or in RGB 61,157,57. The image will now look like this:
Save your image somewhere locally as (gif, jpg or png) .
On your Booking Pad site, click on 'Add Event'

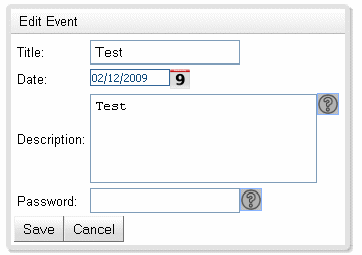
Fill in a name, date and description and then click on 'Save'
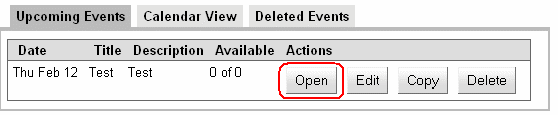
The event list will reload, when it does click on the 'Open' button
You will see a Blank page with some Buttons on it. Click on the 'Design View' Button

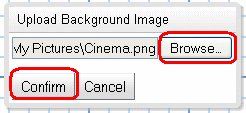
Now we are going to upload our image. Click on the “Upload Image” button. Select your image from your local hard disk and click on “Confirm”.
When you upload the image, Booking Pad will automatically detect the green squares and put booking slots in there place. Click on Booking View and look at the final result.
With a bit of graphic artistry, you can make professional looking events easily!